


Accessing the Knowledge Center effectively requires a simple, one-time registration.
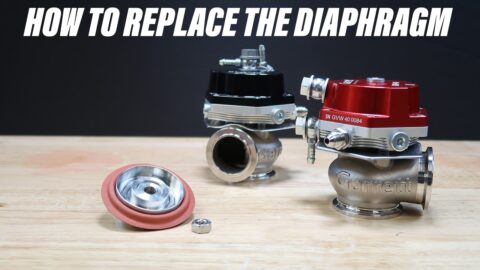
How To Replace External Wastegate Springs
Garrett GVW Wastegates are designed to allow for easy serviceability meaning you can purchase and replace parts as needed to maintain optimum performance of your wastegate. Having spare parts can keep your car running if something happens on a weekend or at a remote race track. Follow along to learn how to replace the wastegate springs or scroll to the bottom to watch the video.
WARNING: Wastegate springs are under pressure and can cause bodily harm if improperly installed. Please wear eye protection. If you have any doubts as to your ability to install this product, consult a local automotive repair company.
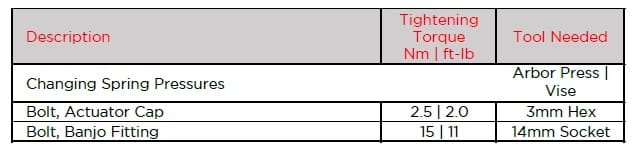
Remove the wastegate from the manifold. Place wastegate into an arbor press and depress the ram so it creates downward pressure on the top cap banjo fitting. Use a fitting to avoid scratching the cover. The ram should be in the center of the cap.
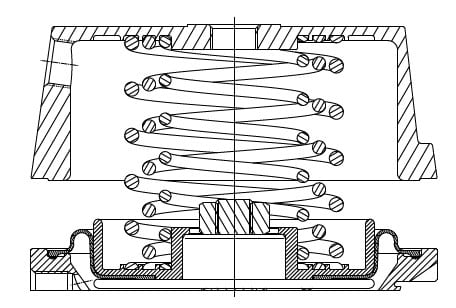
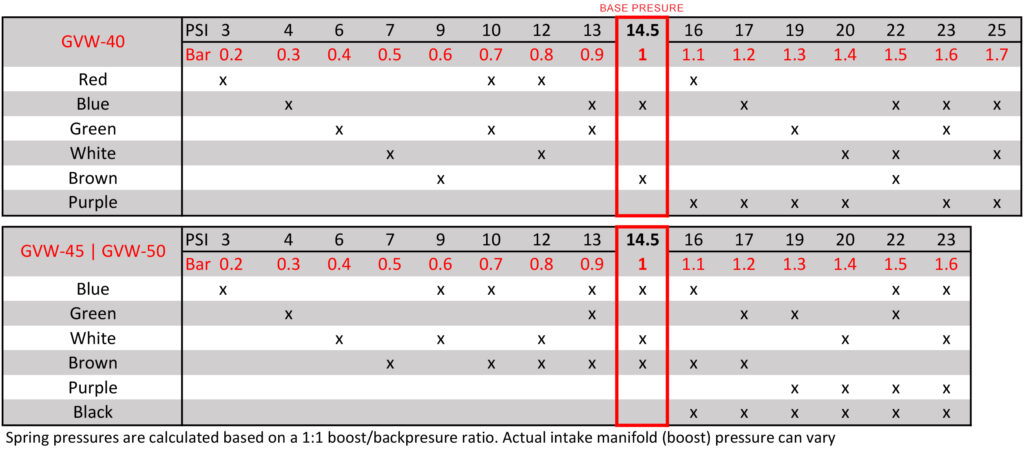
Remove the (6) 3mm hex-head screws in the top cap while maintaining pressure on the ram as to keep the cap from lifting off the body. Once all 6 screws are removed, slowly raise the ram on the arbor press to release the pressure on the springs. Using the spring chart below, identify the appropriate springs you wish to install. GVW wastegates are assembled to 1 Bar | 14.5 PSI.
The springs must sit properly in the grooves to align the diaphragm assembly and actuator cover. Improper placement of the springs may result in failure of the wastegate. Set replacement springs in the diaphragm assembly grooves. Place top cap on and align the longest spring with the appropriate groove in the cap.
Place the wastegate in the arbor press and center it under the ram. Lower the ram slowly until the top cap touches the actuator body. Align the holes in the top cap with the threaded holes on the bottom cap, then install the (6) 3mm hex-head crews. Once all (6) screws are tight, raise the ram, remove the wastegate and torque the hex-head screws to 2.5Nm | 2.0 ft-lb.

See Other Relevant Content from Knowledge Center